Lava 20 Poly Roofing System
Highly Fortified Roof Membrane Solution
The Lava 20 polyurethane membrane system features state-of-the-art moisture curing, yielding a fast and incredibly flexible waterproof barrier with superior tear strength and impact resistance. This durable, easy to apply membrane system transforms commercial flat roofs with unmatched weather-enduring protection and long lasting, architectural-grade aesthetics.
Proven Performance
With 25 years of reliability and 1.3 billion square feet applied without failure, Lava 20 debuts in the USA with confidence and proven success.
Fast & Easy to Apply
Seamlessly applies, offering reduced leaks, superior insulation, and versatile adaptability to all roof types, with fast drying and durability within 30 min.
High Elasticity
Lava 20 guarantee an extraordinary elasticity to resist movements and dilatations of the substrate.
Installation Instructions:
This step-by-step process ensures a seamless integration of our polyurethane and rubber products.
Bitumin-Asphalt
Installation instructions for Bitumen Based Materials
(Asphalt/Torched Down Felt/BUR)
All bitumen surfaces must be fully dry. Ensure asphalts are pressure washed clean and free of any loose particles including moss, algae growth, etc. Applying the Lava 20 membrane over any uncured (not aged) asphalt products will result in staining/blistering.
The use of geotextile matting is required for all bitumen-based materials over the entire surface. The Lava 20 system is designed to cover old bitumen and asphalt-based felts without the need to remove them.
Application Tools & Materials Required
System can be spread out on bitumen surfaces using a roller, brush, squeegee, or airless spray. The use of polyester fabric matting for reinforcement is recommended.
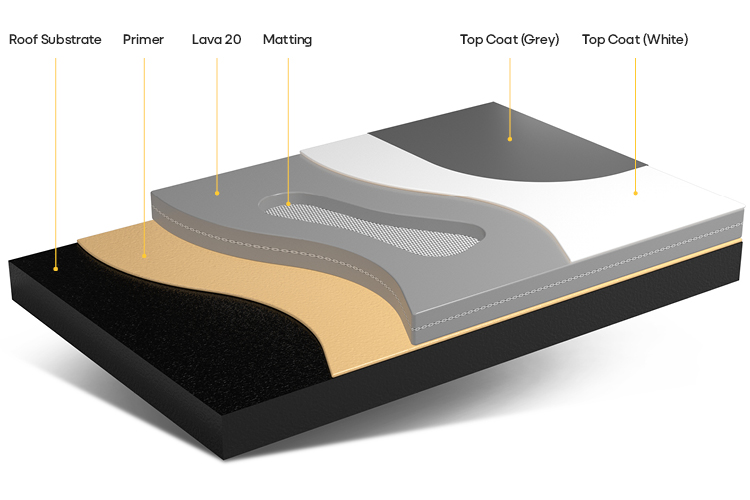
I. Initial Roof Surface Inspection
Prior to applying the LAVA 20 coating system, any residual repairs should be performed. It is important to inspect and examine all elements of the roof, including but not limited to:
- Wet areas or areas with sitting water must be cut out and replaced before application
- Drainage performance
- Water leaks
- Miscellaneous roof penetrations
- Existing corrosion or rust areas
- HVAC flashing and/or debris
- Seams, terminations, and reglets
- Coping and flashing
- Sleepers and pitch pockets
- Sign or display anchorage
- Miscellaneous anchored devices, equipment, or structural supports
II. Roof Surface Preparation
For optimal results, careful surface preparation is important. The surface should be free of any pollution that could compromise the membrane’s adhesion.
A. For best results, the surface should be washed clean, free of loose materials, stains, grease, dust, debris, and other contaminants.
B. System can be spread out on bitumen surfaces using a roller, brush, squeegee, or airless spray. The use of polyester fabric matting for reinforcement is recommended.
C. Optimum moisture shouldn’t be higher than 8%. Do not use Lava 20 system on wet surfaces.
D. Compressive strength of substrate should be at least 25 MPa and viscous strength properties should be at least 1.5 MPa.
E. For concrete surfaces, a grinding machine can be used to remove dust, filth, fats, oils, organic materials, and old loose coatings.
F. Smooth off any surface imperfections found along membrane coverage area.
G. Cracks, joints, and/or voids throughout roof surface should be filled with Lava PU Mastic.
H. Utilize polyester tape or geotextile for flashing drains, joints, and base angles.
I. Ensure that all adjoining surface areas that are not to receive the Lava 20 membrane be thoroughly masked and protected.
J. Setup a suitable, easy-to-access workstation for the sorting and mixing of all membrane materials.
K. Schedule and synchronize applications of each Lava 20 layer for accurate coating times. Make sure to apply the entire system during temperature conditions between 41 °F and 95 °F.
L. An adhesion test is recommended for certain materials including metal, steel, EPDM, or TPO in order to ensure maximum adhesion to the substrate.
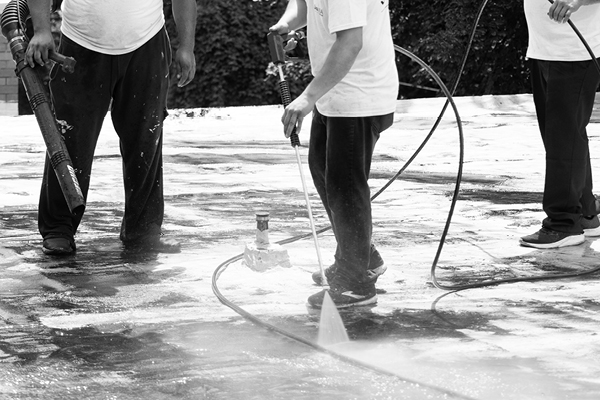
Step 1
Wash
Wash entire surface clean, removing all surface debris, dirt, embedded stains, chemicals or oils, and organic matter.
Step 2
Inspect
Inspect and verify that the entire roof surface is completely dry and free of wet spotting.
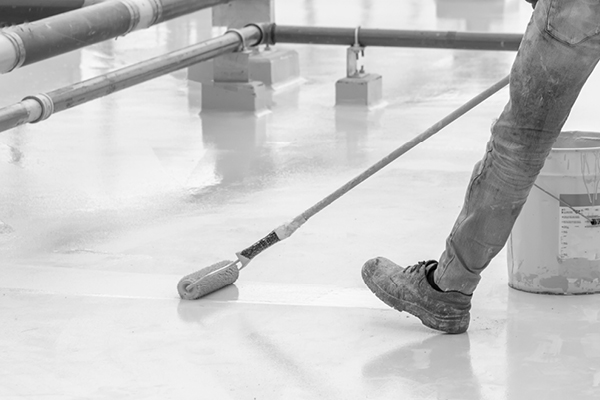
Step 3
Primer
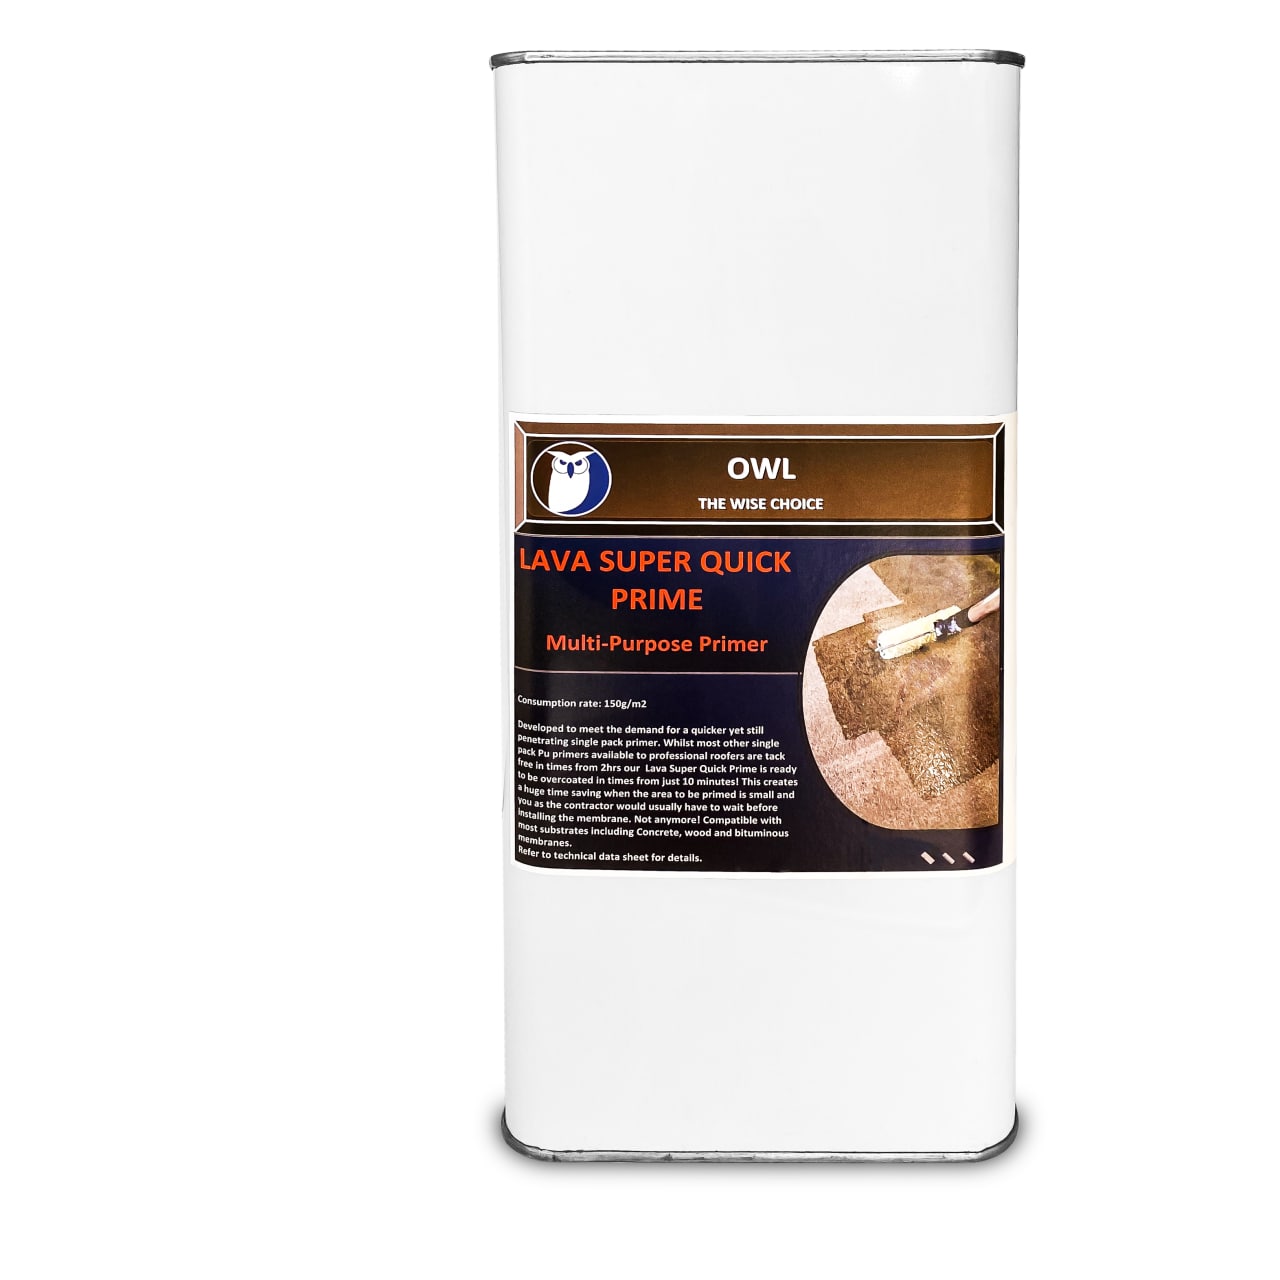
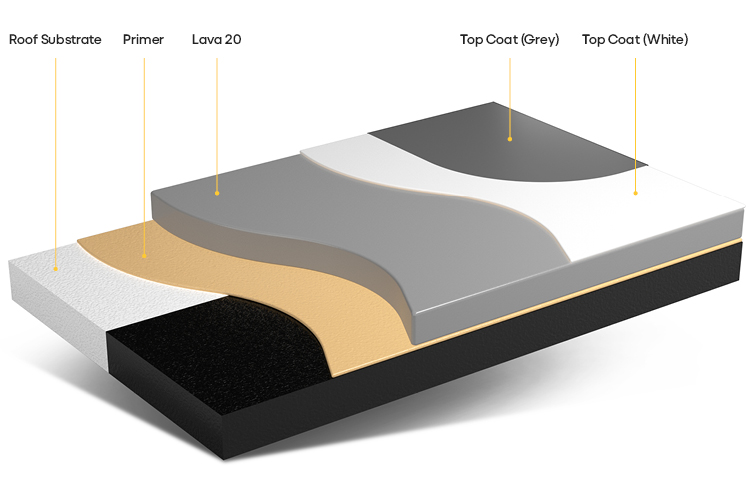
Prime the entire surface area with Lava 20 Quick Primer at a rate of one gallon per 300-350 sq. ft. and allow for a minimum of 15-30 minutes dry time.
Step 4
Membrane
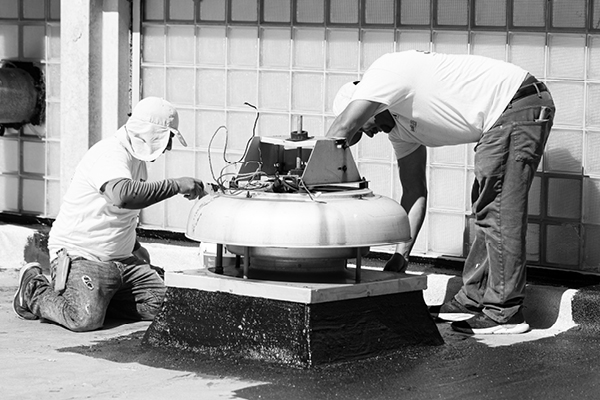
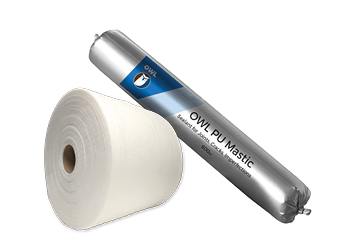
a. Cracks, joints, and/or voids throughout roof surface should be filled with Lava PU Mastic.
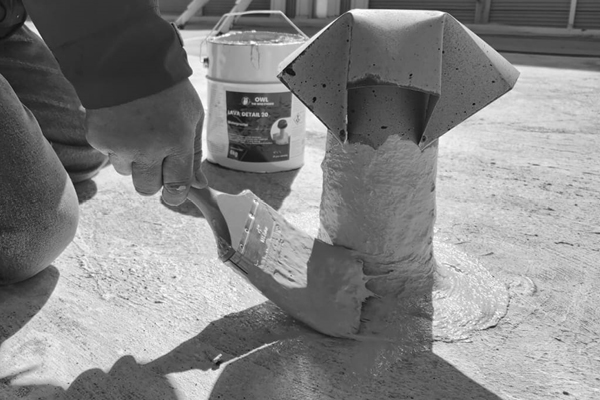
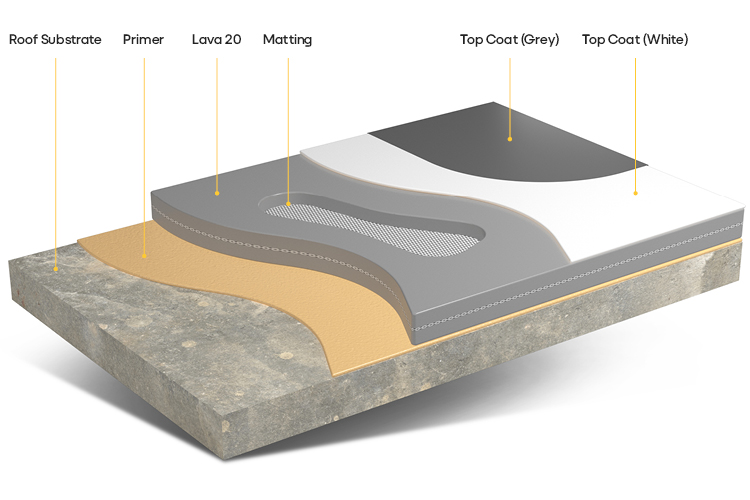
b. Wall-to-floor connections, joints, 90° angles, chimneys, pipelines, waterspouts (siphon), etc. should always be reinforced with geotextile matting or equivalent, overlapping strips by 5-10 cm in order to strengthen the entire surface.
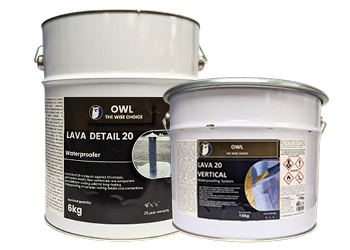
• Use Lava 20 Vertical Membrane for vertical and sloped surfaces, specifically formulated with high viscosity for easy application on parapet walls and other vertical roof structures.
• Use Lava 20 Detail Membrane for patching or filling large holes, gaps, and other roof penetrations, specifically formulated for rapid, bubble free curing over roof detail structures.
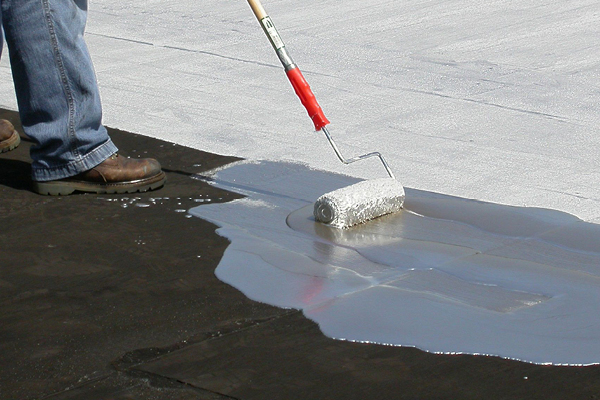
c. A cut piece of fabric can be applied over still-wet Lava 20, then pushed inward until fully absorbed. Once fully absorbed, saturate this area again with additional Lava 20.
d. Coat the entire surface area with Lava 20 Waterproofing Membrane at a rate of 18.4 sq. ft. per gallon.
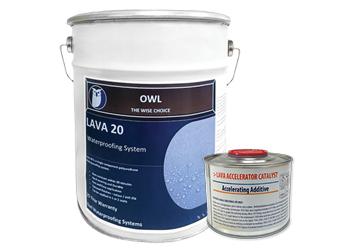
e. By incorporating Lava 20 Catalyst, the entire surface can be covered in a single coat. Thoroughly mix 0.19 gallons of Lava 20 Catalyst directly into a 6.6-gallon bucket of membrane.

Step 5
Top Coat
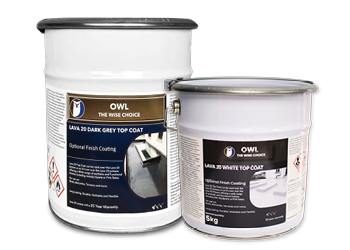
Apply the Lava 20 Top Coat over the entire surface area at a rate of 1 gallon per 365 sq. ft. Standard colors include white or dark grey, with additional custom colors available for special orders.
a. For final color stable, chalk-free surface appearances, apply no more than 1 or 2 layers of Lava 20 Top Coat.
b. For final dark colors, additional custom colors can be ordered.
Step 6
Curing & Finishing
Do not apply any Lava 20 layers thicker than 2.5 mm (dry film). For ideal curing, the temperature range during/after application should be between 41 °F and 95 °F. If the temperature conditions are too high, curing is hastened. If the temperature conditions are too low, curing is delayed.
Concrete
Installation instructions for Concrete Substrates
For newly set concrete structures, at least 28 days curing time is required before applying Lava 20. Both new and existing concrete surfaces must be completely dry prior to application. Oil, grease, curing compounds, loose particles, moss, algae growth, laitance, friable matter, dirt, bituminous products, and previous water proofing materials must be removed.
Application Tools & Materials Required
System can be spread out on concrete surfaces using a roller, brush, squeegee, or airless spray. The use of polyester fabric matting for reinforcement is recommended.
For new surfaces, ensure that concrete has undergone at least 28 days of curing time.
I. Initial Roof Surface Inspection
Prior to applying the LAVA 20 coating system, any residual repairs should be performed. It is important to inspect and examine all elements of the roof, including but not limited to:
- Wet areas or areas with sitting water must be cut out and replaced before application
- Drainage performance
- Water leaks
- Miscellaneous roof penetrations
- Existing corrosion or rust areas
- HVAC flashing and/or debris
- Seams, terminations, and reglets
- Coping and flashing
- Sleepers and pitch pockets
- Sign or display anchorage
- Miscellaneous anchored devices, equipment, or structural supports
II. Roof Surface Preparation
For optimal results, careful surface preparation is important. The surface should be free of any pollution that could compromise the membrane’s adhesion.
A. For best results, the surface should be washed clean, free of loose materials, stains, grease, dust, debris, and other contaminants.
B. System can be spread out on bitumen surfaces using a roller, brush, squeegee, or airless spray. The use of polyester fabric matting for reinforcement is recommended.
C. Optimum moisture shouldn’t be higher than 8%. Do not use Lava 20 system on wet surfaces.
D. Compressive strength of substrate should be at least 25 MPa and viscous strength properties should be at least 1.5 MPa.
E. For concrete surfaces, a grinding machine can be used to remove dust, filth, fats, oils, organic materials, and old loose coatings.
F. Smooth off any surface imperfections found along membrane coverage area.
G. Cracks, joints, and/or voids throughout roof surface should be filled with Lava PU Mastic.
H. Utilize polyester tape or geotextile for flashing drains, joints, and base angles.
I. Ensure that all adjoining surface areas that are not to receive the Lava 20 membrane be thoroughly masked and protected.
J. Setup a suitable, easy-to-access workstation for the sorting and mixing of all membrane materials.
K. Schedule and synchronize applications of each Lava 20 layer for accurate coating times. Make sure to apply the entire system during temperature conditions between 41 °F and 95 °F.
L. An adhesion test is recommended for certain materials including metal, steel, EPDM, or TPO in order to ensure maximum adhesion to the substrate.

Step 1
Wash
Wash entire surface clean, removing all surface debris, dirt, embedded stains, chemicals or oils, and organic matter.
Step 2
Inspect
Inspect and verify that the entire roof surface is completely dry and free of wet spotting.

Step 3
Primer
Prime the entire surface area with Lava 20 Quick Primer at a rate of one gallon per 300-350 sq. ft. and allow for a minimum of 15-30 minutes dry time. Concrete or cement screed are highly absorbent surfaces and require cure times according to manufacturer specifications


Step 4
Membrane
a. Cracks, joints, and/or voids throughout roof surface should be filled with Lava PU Mastic.
b. Wall-to-floor connections, joints, 90° angles, chimneys, pipelines, waterspouts (siphon), etc. should always be reinforced with geotextile matting or equivalent, overlapping strips by 5-10 cm in order to strengthen the entire surface.


• Use Lava 20 Vertical Membrane for vertical and sloped surfaces, specifically formulated with high viscosity for easy application on parapet walls and other vertical roof structures.
• Use Lava 20 Detail Membrane for patching or filling large holes, gaps, and other roof penetrations, specifically formulated for rapid, bubble free curing over roof detail structures.


c. A cut piece of fabric can be applied over still-wet Lava 20, then pushed inward until fully absorbed. Once fully absorbed, saturate this area again with additional Lava 20.
d. Coat the entire surface area with Lava 20 Waterproofing Membrane at a rate of 18.4 sq. ft. per gallon.
e. By incorporating Lava 20 Catalyst, the entire surface can be covered in a single coat. Thoroughly mix 0.19 gallons of Lava 20 Catalyst directly into a 6.6-gallon bucket of membrane.


Step 5
Top Coat
Apply the Lava 20 Top Coat over the entire surface area at a rate of 1 gallon per 365 sq. ft. Standard colors include white or dark grey, with additional custom colors available for special orders.
a. For final color stable, chalk-free surface appearances, apply no more than 1 or 2 layers of Lava 20 Top Coat.
b. For final dark colors, additional custom colors can be ordered.

Step 6
Curing & Finishing
Do not apply any Lava 20 layers thicker than 2.5 mm (dry film). For ideal curing, the temperature range during/after application should be between 41 °F and 95 °F. If the temperature conditions are too high, curing is hastened. If the temperature conditions are too low, curing is delayed.
EPDM-TPO
Installation instructions for EPDM or TPO Surfaces
It is recommended to conduct an adhesion test for extremely durable synthetic rubber roofing membranes (EPDM) and single-ply Thermoplastic Polyolefin (TPO) substrates in order to ensure the best adhesion possible.
Application Tools & Materials Required
System can be spread out on EPDM or TPO surfaces using a roller, brush, squeegee, or airless spray. The use of polyester fabric matting is recommended for reinforcement.

Step 1
Wash
Wash entire surface clean, removing all surface debris, dirt, embedded stains, chemicals or oils, and organic matter.
Step 2
Inspect
Inspect and verify that the entire roof surface is completely dry and free of wet spotting.

Step 3
Primer
Prime the entire surface area with Lava 20 Quick Primer at a rate of one gallon per 300-350 sq. ft. and allow for a minimum of 15-30 minutes dry time.


Step 4
Membrane
a. Cracks, joints, and/or voids throughout roof surface should be filled with Lava PU Mastic.
b. Wall-to-floor connections, joints, 90° angles, chimneys, pipelines, waterspouts (siphon), etc. should always be reinforced with geotextile matting or equivalent, overlapping strips by 5-10 cm in order to strengthen the entire surface.


• Use Lava 20 Vertical Membrane for vertical and sloped surfaces, specifically formulated with high viscosity for easy application on parapet walls and other vertical roof structures.
• Use Lava 20 Detail Membrane for patching or filling large holes, gaps, and other roof penetrations, specifically formulated for rapid, bubble free curing over roof detail structures.


c. A cut piece of fabric can be applied over still-wet Lava 20, then pushed inward until fully absorbed. Once fully absorbed, saturate this area again with additional Lava 20.
d. Coat the entire surface area with Lava 20 Waterproofing Membrane at a rate of 18.4 sq. ft. per gallon.
e. By incorporating Lava 20 Catalyst, the entire surface can be covered in a single coat. Thoroughly mix 0.19 gallons of Lava 20 Catalyst directly into a 6.6-gallon bucket of membrane.


Step 5
Top Coat
Apply the Lava 20 Top Coat over the entire surface area at a rate of 1 gallon per 365 sq. ft. Standard colors include white or dark grey, with additional custom colors available for special orders.
a. For final color stable, chalk-free surface appearances, apply no more than 1 or 2 layers of Lava 20 Top Coat.
b. For final dark colors, additional custom colors can be ordered.

Step 6
Curing & Finishing
Do not apply any Lava 20 layers thicker than 2.5 mm (dry film). For ideal curing, the temperature range during/after application should be between 41 °F and 95 °F. If the temperature conditions are too high, curing is hastened. If the temperature conditions are too low, curing is delayed.
Metal-Steel
Installation instructions for Metal or Steel Surfaces
All metal/steel surfaces must be thoroughly cleaned and dried prior to application. Rust (iron oxide) is the result of oxygen and water or excessive moisture on metal surfaces. All rust areas must be treated before using Lava 20 Quick Primer.
Both new and existing surfaces must be completely dry prior to application. Oil, grease, curing compounds, loose particles, moss, algae growth, laitance, friable matter, dirt, bituminous products, and previous water proofing materials must be removed..
Application Tools & Materials Required
System can be spread out on metal/steel surfaces using a roller, brush, squeegee, or airless spray. The use of polyester fabric tape is recommended for reinforcement.

Step 1
Wash
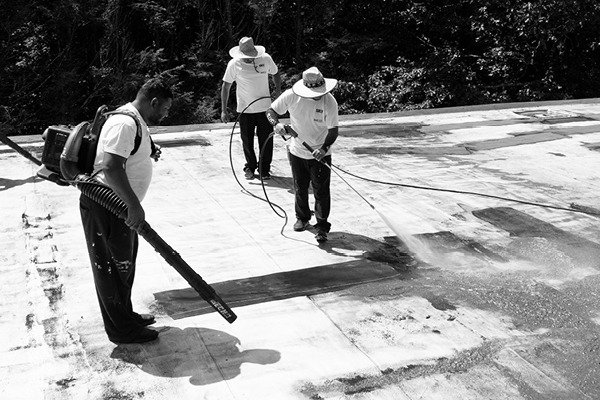
Pressure wash entire surface clean, removing all surface debris, dirt, embedded stains, chemicals or oils, and organic matter.
Step 2
Inspect
Inspect and verify that the entire roof surface is completely dry and free of wet spotting.
Step 3
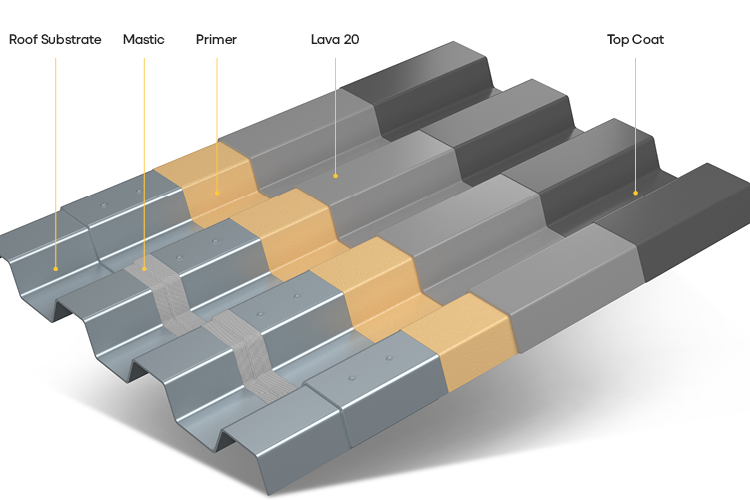
Apply Lava PU Mastic for all nuts or bolts.

Step 4
Primer
Prime the entire surface area with Lava 20 Quick Primer at a rate of one gallon per 300-350 sq. ft. and allow for a minimum of 15-30 minutes dry time.

Step 5
Membrane
a. Cracks, joints, and/or voids throughout roof surface should be filled with Lava PU Mastic.
b. Wall-to-floor connections, joints, 90° angles, chimneys, pipelines, waterspouts (siphon), etc. should always be reinforced with geotextile matting or equivalent, overlapping strips by 5-10 cm in order to strengthen the entire surface.


• Use Lava 20 Vertical Membrane for vertical and sloped surfaces, specifically formulated with high viscosity for easy application on parapet walls and other vertical roof structures.
• Use Lava 20 Detail Membrane for patching or filling large holes, gaps, and other roof penetrations, specifically formulated for rapid, bubble free curing over roof detail structures.


c. A cut piece of fabric can be applied over still-wet Lava 20, then pushed inward until fully absorbed. Once fully absorbed, saturate this area again with additional Lava 20.
d. Coat the entire surface area with Lava 20 Waterproofing Membrane at a rate of 27 sq. ft. per gallon.
e. By incorporating Lava 20 Catalyst, the entire surface can be covered in a single coat. Thoroughly mix 0.19 gallons of Lava 20 Catalyst directly into a 6.6-gallon bucket of membrane.


Step 5
Top Coat
Apply the Lava 20 Top Coat over the entire surface area at a rate of 1 gallon per 365 sq. ft. Standard colors include white or dark grey, with additional custom colors available for special orders.
a. For final color stable, chalk-free surface appearances, apply no more than 1 or 2 layers of Lava 20 Top Coat.
b. For final dark colors, additional custom colors can be ordered.

Step 6
Curing & Finishing
Do not apply any Lava 20 layers thicker than 2.5 mm (dry film). For ideal curing, the temperature range during/after application should be between 41 °F and 95 °F. If the temperature conditions are too high, curing is hastened. If the temperature conditions are too low, curing is delayed.
Wood-Plywood
Installation instructions for Wood/Plywood Substrates
Application Tools & Materials Required
Coating over wet wood/plywood surfaces will greatly reduce Lava 20 membrane adhesion.
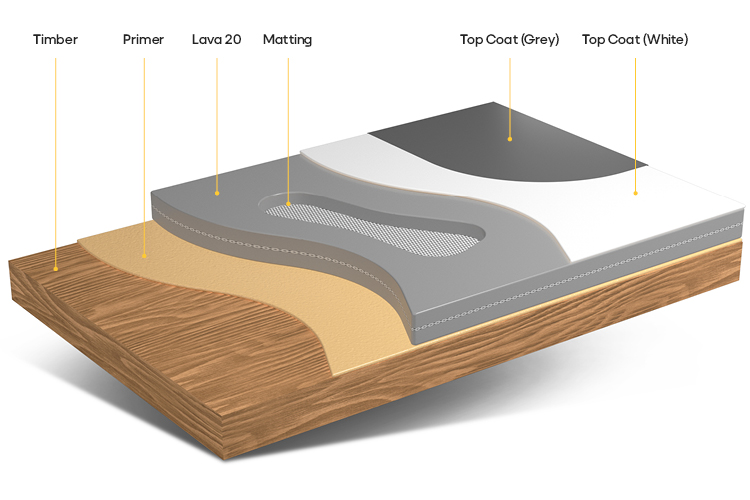
System can be spread out on wood/plywood surfaces using a roller, brush, squeegee, or airless spray. The use of polyester fabric matting for reinforcement is recommended.

Step 1
Wash
Wash entire surface clean, removing all surface debris, dirt, embedded stains, chemicals or oils, and organic matter.
Step 2
Inspect
Inspect and verify that the entire roof surface is completely dry and free of wet spotting.

Step 3
Primer
Prime the entire surface area with Lava 20 Quick Primer at a rate of one gallon per 300-350 sq. ft. and allow for a minimum of 15-30 minutes dry time.

Step 4
Membrane
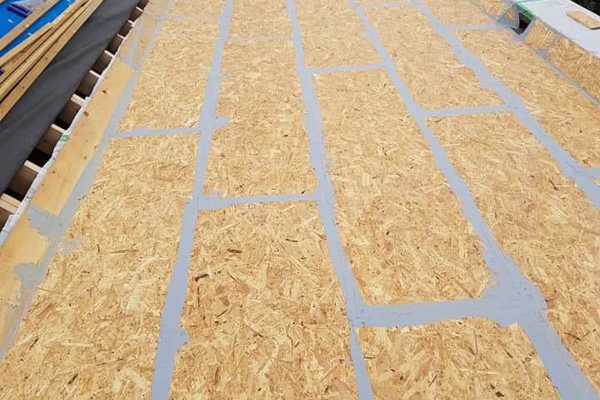
a. Cracks, joints, and/or voids throughout roof surface should be filled with Lava PU Mastic.
b. Wall-to-floor connections, joints, 90° angles, chimneys, pipelines, waterspouts (siphon), etc. should always be reinforced with geotextile matting or equivalent, overlapping strips by 5-10 cm in order to strengthen the entire surface.


• Use Lava 20 Detail Membrane for patching or filling large holes, gaps, and other roof penetrations, specifically formulated for rapid, bubble free curing over roof detail structures.


d. Coat the entire surface area with Lava 20 Waterproofing Membrane at a rate of 18.4 sq. ft. per gallon.
e. By incorporating Lava 20 Catalyst, the entire surface can be covered in a single coat. Thoroughly mix 0.19 gallons of Lava 20 Catalyst directly into a 6.6-gallon bucket of membrane.


Step 5
Top Coat
Apply the Lava 20 Top Coat over the entire surface area at a rate of 1 gallon per 365 sq. ft. Standard colors include white or dark grey, with additional custom colors available for special orders.
a. For final color stable, chalk-free surface appearances, apply no more than 1 or 2 layers of Lava 20 Top Coat.
b. For final dark colors, additional custom colors can be ordered.

Step 6
Curing & Finishing
Do not apply any Lava 20 layers thicker than 2.5 mm (dry film). For ideal curing, the temperature range during/after application should be between 41 °F and 95 °F. If the temperature conditions are too high, curing is hastened. If the temperature conditions are too low, curing is delayed..
Lava 20 Poly Membrane Technical Data
|
PROPERTY |
RESULTS |
TEST METHOD |
|
Elongation at Break |
< 600 % |
ASTM D 412 / DIN 52455 |
|
Tensile Strength |
> 4 NI mm2 |
ASTM D 412 / DIN 52455 |
|
Water Vapor Permeability |
> 25 gr/m2/day |
ISO 99932:91 |
|
Resistance to Mechanical Damage by Static Impression |
High Resistance (class: P3) |
EOTA TR-007 |
|
Resistance to Mechanical Damage by Dynamic Impression |
High Resistance (class: P3) |
EOTA TR-006 |
|
Resistance to Water Pressure |
No Leak (1m water column, 24h) |
DIN EN 1928 |
|
Adhesion to concrete |
>2.0 N/mm2 (concrete surface failure) |
ASTM D 903 |
|
Crack Bridaina Capability |
Up to 2 mm crack |
EOTA TR-008 |
|
Hardness (Shore A Scale) |
65-70 |
ASTM D 903 |
|
Resistance to Root Penetration |
Resistant |
UNE 53420 |
|
Solar Reflectance (SR) |
0.87 |
ASTM E903-96 |
|
Solar Emittance (e) |
0.89 |
ASTM E408-71 |
|
Thermal Resistance (176 °F for 100 days) |
Passed. No significant changes |
EOTA TR-011 |
|
UV Accelerate – Aging in the Presence of Moisture |
Passed. No significant changes |
EOTA TR-010 |
|
Resistance After Water Aging |
Passed |
EOTA TR-012 |
|
Hydrolysis (5% KOH, ? days cycle) |
No significant elastomeric channel |
Inhouse Lab |
|
Construction Material Fire Class |
B2 |
DIN 4102-1 |
|
Resistance to Flying Sparks and Radiation Heat |
Passed |
DIN 4102-7 |
|
Service Temperature |
-22 °F to +302 °F |
Inhouse Lab |
|
Shock Temperature (20 min) |
392 °F |
Inhouse Lab |
|
Rain Stability Time |
3-4 hours |
Conditions: 68 °F, 50% RH |
|
Light Pedestrian Traffic Time |
18-24 hours |
Conditions: 68 °F, 50% RH |
|
Final Curing Time |
7 days |
Conditions: 68 °F, 50% RH |
|
Chemical Properties |
Good resistance against acidic and alkali solutions (5%), detergents, seawater, and oils. |
|
Bitumen Surfaces Application Term Rates
| Coverage Term | Primer (Gal/Sq) |
DFT mils |
Geotextile (6 mils) |
Lava 20 Gal/Sq |
DFT Mils |
Catalyst |
Topcoat |
DFT |
Total DFT |
Warranty |
| 25 years | 0.47 | 2 | Y | 5.9 | 95 | Y | 0.38 | 3 | 106 | Platinum |
| 20 years | 0.47 | 2 | Y | 4.5 | 75 | Y | 0.38 | 3 | 86 | Platinum |
